Russo-Japanese War Map: Battle Locations Explained
The Russo-Japanese War, fought between 1904 and 1905, was a pivotal conflict that showcased the imperial ambitions of both Japan and Russia. As the first major war of the 20th century and one of the first to feature modern technologies on the battlefield, this tumultuous clash reverberated throughout the globe. To comprehend the intricacies of this conflict, one must delve into the battle locations, each marked by strategic significance and historic fervor. Here are some vital maps illustrating the geographic dimensions of the Russo-Japanese War:
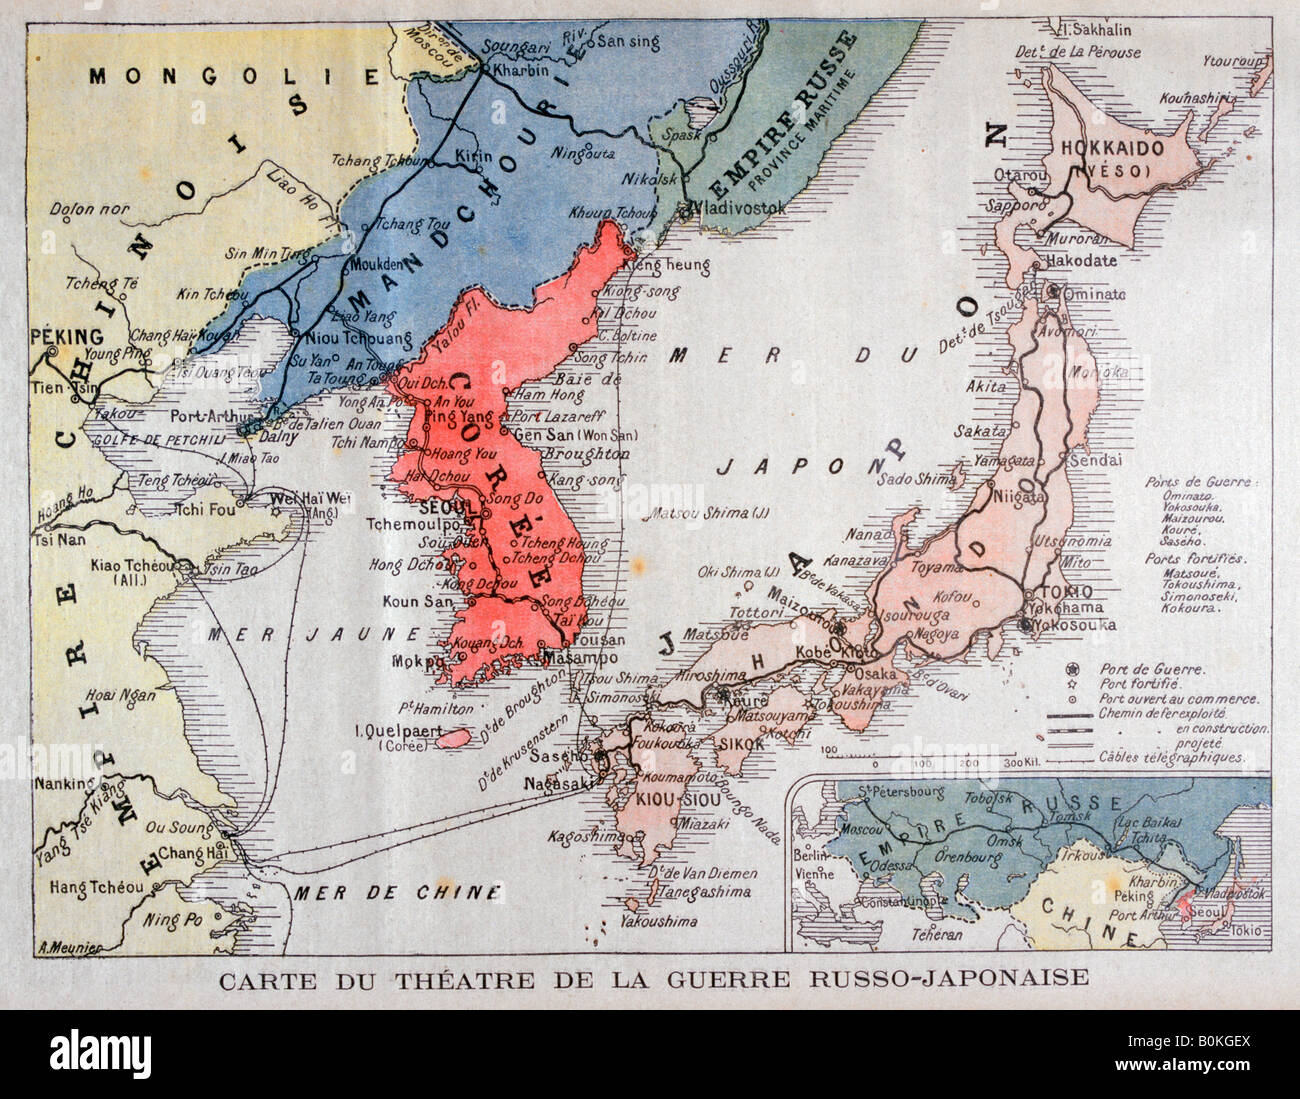
Russo Japanese War Map

This map provides a comprehensive overview of the major theaters of war, highlighting pivotal locations such as Port Arthur and Mukden. With meticulous attention to detail, it illustrates troop movements and critical supply routes, offering a visual representation of the strategic implications that governed the conflict.
Russo Japanese War Map

An engaging representation of the various battlefields, this map delineates the two powers’ advances. The contrasting colors symbolize territorial gains and losses, serving as a stark reminder of the shifting dynamics throughout this grueling contest.
Russo Japanese War Map – Alamy Stock
Featuring a high-resolution topographical depiction, this map is an artistic marvel that reveals the geographical nuances of the war. It captures the elevation changes and water bodies which played a crucial role in military strategies. An exploration of this map allows one to appreciate the natural barriers that both armies had to navigate.
Russo Japanese War Battle Map
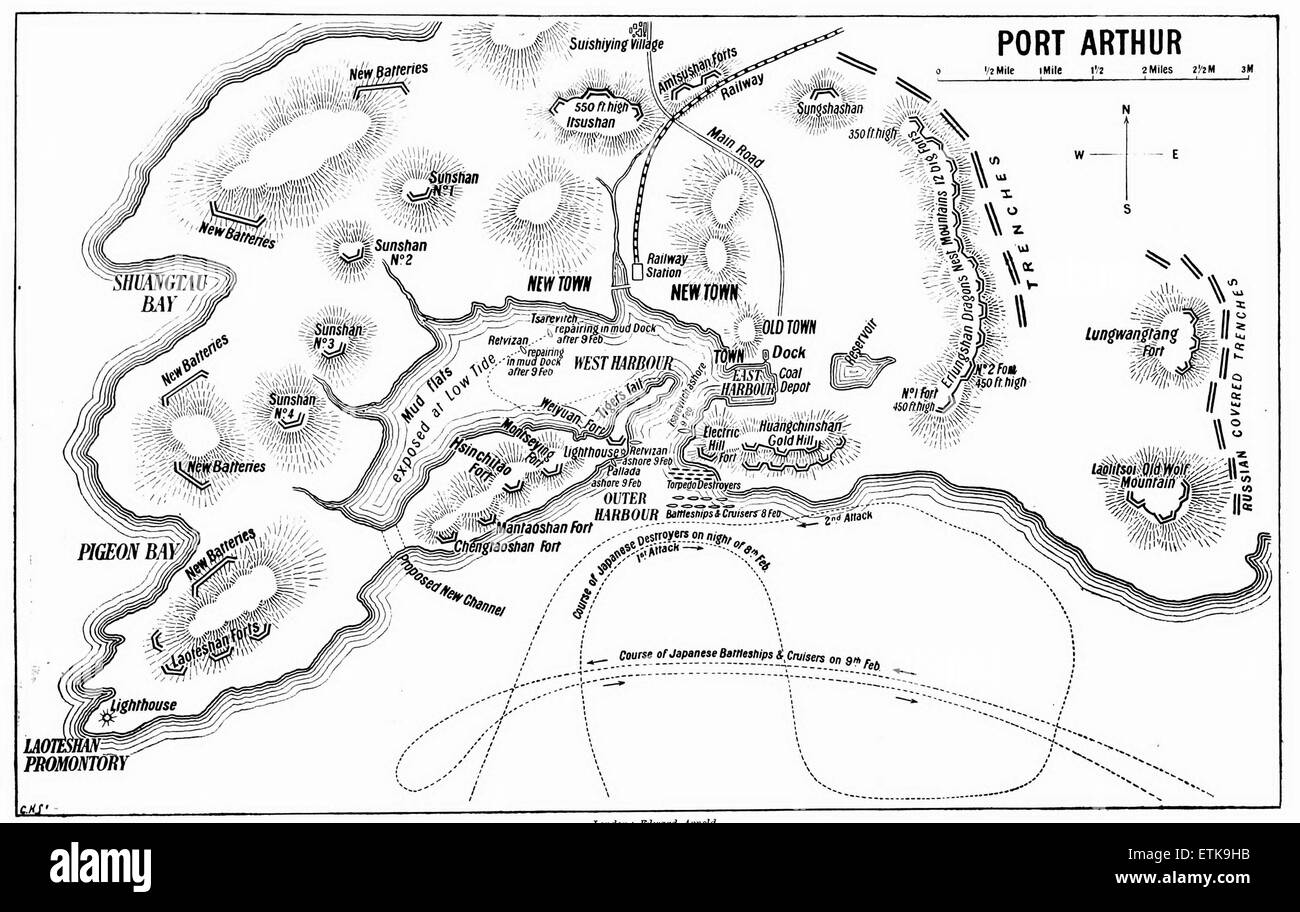
Focusing specifically on the Siege of Port Arthur, this map unveils the intricate fortifications and the sequence of assaults waged by Japanese forces. The attention to detail in the layout underlines the intensity of the siege and the resilience exhibited by both combatants.
Russo Japanese War Battle Map Russo Japanese War
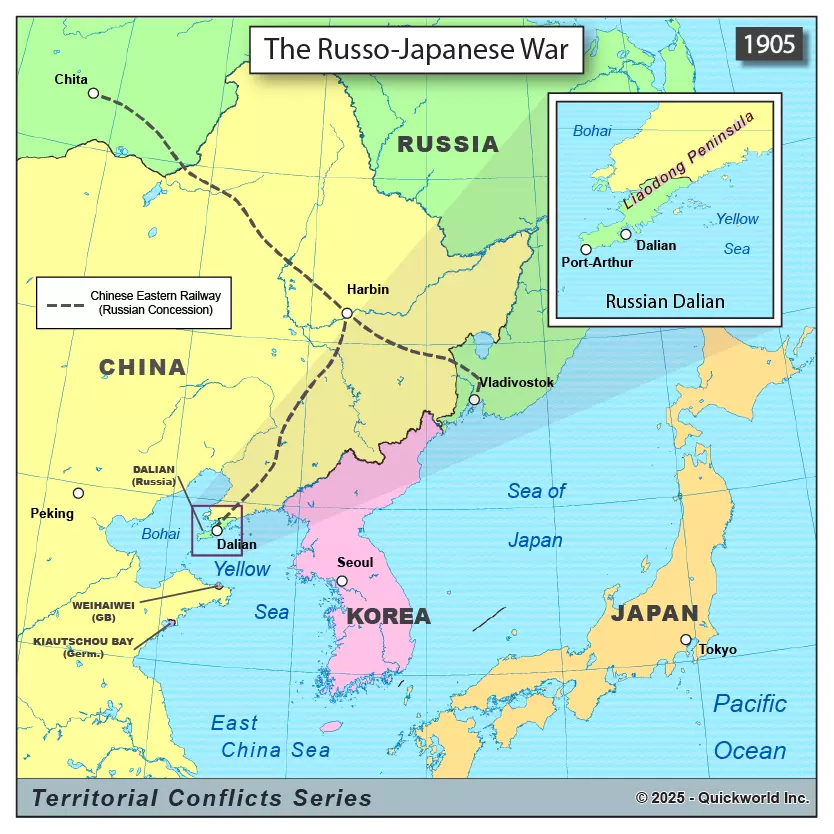
This dynamic map highlights a series of decisive battles, such as the Battle of Tsushima, which ultimately swung the momentum in favor of Japan. Each battle is punctuated with markers indicating the locational context—inviting viewers to contemplate the broader implications of these military encounters on the global stage.
In exploring these maps, one can grasp not only the geographical layout of the conflict but also the human drama that unfolded in each location. Every dotted line tells a story of ambition, sacrifice, and the relentless pursuit of dominance in an age of shifting power dynamics.